
RecyclerView Part 1: Android RecyclerView Example

Today, we want to introduce to you the first post in our series about new shiny collection view in Android: RecyclerView. Android Developer page give us a definition: A flexible view for providing a limited window into a large data set.
Several Terms
- Adapter: A subclass of
RecyclerView.Adapterresponsible for providing views that represent items in a data set. - Position: The position of a data item within an
Adapter. - Index: The index of an attached child view as used in a call to
getChildAt(int). Contrast with Position. - Binding: The process of preparing a child view to display data corresponding to a position within the adapter.
- Recycle (view): A view previously used to display data for a specific adapter position may be placed in a cache for later reuse to display the same type of data again later. This can drastically improve performance by skipping initial layout inflation or construction.
- Scrap (view): A child view that has entered into a temporarily detached state during layout. Scrap views may be reused without becoming fully detached from the parent RecyclerView, either unmodified if no rebinding is required or modified by the adapter if the view was considered dirty.
- Dirty (view): A child view that must be rebound by the adapter before being displayed.
You can see that the RecyclerView is a replacement for all ListView and GridView which are so popular with us since the first day of Android. We will start with a simple example about RecyclerView, so you can understand easiliy how it work and what does it look like.
Android RecyclerView Example
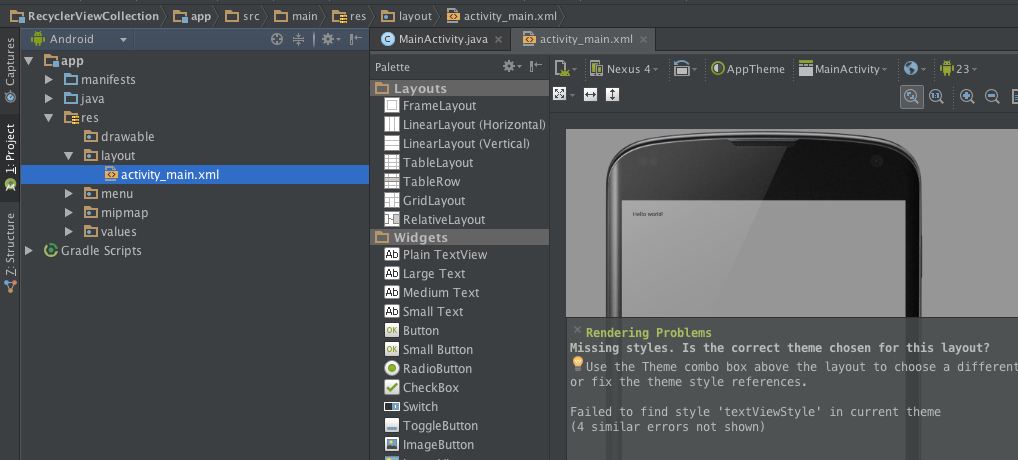
First, create a new project in Android Studio, give it the name of RecyclerViewCollection, as our series will continue evolve with each post. Here I use Android Studio version 1.3 (latest stable at the time of writing), with Android SDK is fully updated and target Android 6.0 Marshmallow (API level 23):
[ om/content/images/2015/09/RecyclerView_1_Example.png)
Add RecyclerView as dependency in build.gradle
As RecyclerView is from Android support library, we need to add it as our dependency in our module build.gradle, open up this file and add the following line in dependencies block:
compile 'com.android.support:recyclerview-v7:23.0.0'
You may see the message of Android Studio which tell us that the Gradle files have changed since last project sync… Click on Sync Now button or manually click on Sync Project with Gradle files on Toolbar, so our RecyclerView can be available after.
XML Layout
Open your activity XML layout file. Add RecyclerView with width and height are set to match_parent. Then give it an id. You can see it is similar to normal ListView:
<RelativeLayout
  xmlns:android="http://schemas.android.com/apk/res/android"
  xmlns:tools="http://schemas.android.com/tools"
  android:layout_width="match_parent"
  android:layout_height="match_parent"
  android:paddingBottom="@dimen/activity_vertical_margin"
  android:paddingLeft="@dimen/activity_horizontal_margin"
  android:paddingRight="@dimen/activity_horizontal_margin"
  android:paddingTop="@dimen/activity_vertical_margin"
  tools:context=".MainActivity">
  <android.support.v7.widget.RecyclerView
    android:id="@+id/recycler_view"
    android:layout_width="match_parent"
    android:layout_height="match_parent" />
</RelativeLayout>
We also need a layout for our row, or we mean item. With this example, we will only use a TextView to be item. Create a new layout resource file:
[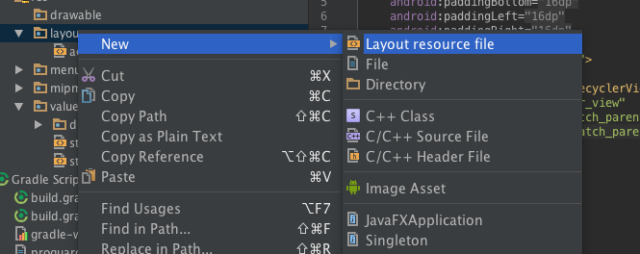 om/content/images/2015/09/RecyclerView_1_NewLayout.png)
Inside our layout, place a TextView with a 4dp padding and give it an id, of course. Note that the width and height of the item:
<?xml version="1.0" encoding="utf-8"?>
<TextView
  xmlns:android="http://schemas.android.com/apk/res/android"
  android:id="@+id/view_item_text"
  android:layout_width="match_parent"
  android:layout_height="wrap_content"
  android:orientation="vertical"
  android:padding="4dp"
  android:textSize="16sp" />
Ok, it is enough for XMLs, we go to our Java code now.
RecyclerView Activity: Adapter and the Holder
You may familiar with holder pattern of ListView or GridView. Now with RecyclerView, this pattern is official supported. We will need a Holder class and an Adapter class for our RecyclerView:
static class SimpleHolder extends RecyclerView.ViewHolder {
 TextView mTextView;
 public SimpleHolder(View itemView) {
  super(itemView);
  this.mTextView = (TextView) itemView.findViewById(R.id.view_item_text);
 }
}
Then the Adapter:
class SimpleAdapter extends RecyclerView.Adapter < SimpleHolder > {
 @Override public int getItemCount() {
  return 0;
 }
 @Override public SimpleHolder onCreateViewHolder(ViewGroup viewGroup, int i) {
  View view = getLayoutInflater().inflate(R.layout.view_item, viewGroup, false);
  return new SimpleHolder(view);
 }
 @Override public void onBindViewHolder(SimpleHolder simpleHolder, int i) {}
}
The method getItemCount has the same meaning with ListView. Pay attention to other methods:
onCreateViewHolder: this method return a holder for us, which should be our recently created holder classonBindViewHolder: this method will be called whenever RecyclerView need to refresh our item view
Sample Model and Binding
For simplicity, we use a simple string array to construct our model:
public static final String[] JAVA_BOOKS = {"JPA Mini Book", "JVM Troubleshooting Guide", "JUnit Tutorial for Unit Testing", "Java Annotations Tutorial", "Java Interview Questions", "Spring Interview Questions", "Android UI Design"};
Adjust our Adapter to present the view:
class SimpleAdapter extends RecyclerView.Adapter < SimpleHolder > {
 @Override public int getItemCount() {
  return JAVA_BOOKS.length;
 }
 @Override public SimpleHolder onCreateViewHolder(ViewGroup viewGroup, int i) {
  View view = getLayoutInflater().inflate(R.layout.view_item, viewGroup, false);
  return new SimpleHolder(view);
 }
 @Override public void onBindViewHolder(SimpleHolder simpleHolder, int i) {
  simpleHolder.mTextView.setText(JAVA_BOOKS[i]);
 }
}
In our activity, get the RecyclerView and assign the adapter to it. Note that the RecyclerView requires a LayoutManager. Here we use LinearLayoutManager with orientation is vertical so it can act like regular ListView:
RecyclerView mRecyclerView = (RecyclerView) findViewById(R.id.recycler_view);
mRecyclerView.setLayoutManager(new LinearLayoutManager(this, LinearLayoutManager.VERTICAL, false));
mRecyclerView.setAdapter(new SimpleAdapter());
Run the project, and this is the intended result:
[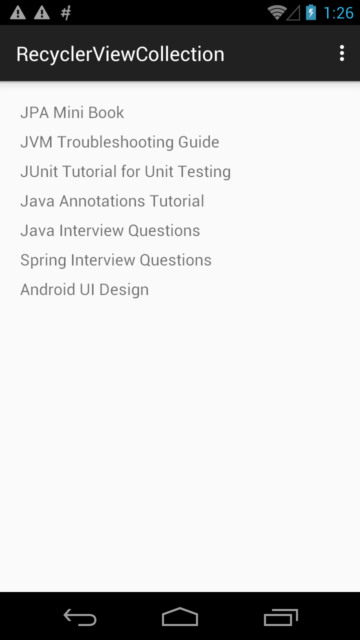 om/content/images/2015/09/RecyclerView_1_Running.png)
In next post, we will go deeper about RecyclerView and other elements around it. But now you can clone source code of this example at GitHub.