
Animate Time Count Down in Swift

We have just finished a piece in our UI for next project, and we are excited to share with you today. This is what it look like:

As you can see, the label display timestamp, which is suitable with duration field. And it count down to zero and animate the text at each tick. To achieve such animation, we use the awesome library TOMSMorphingLabel.
Setup Dependency
We use CocoaPods to manage dependencies, so we add the following line to our Podfile:
pod 'TOMSMorphingLabel', '~> 0.5'
Then run pod install against our working directory to have the library correctly installed.
Add Label to Storyboard
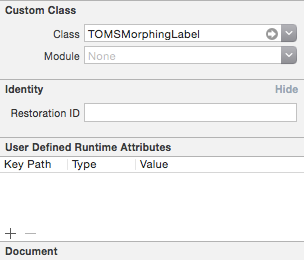
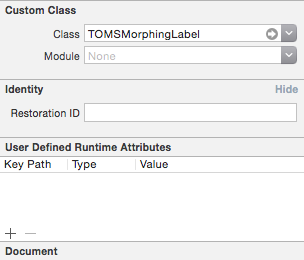
Drag an UILabel to your user interface, storyboard or .xib, then change its class to TOMSMorphingLabel:
Create an outlet for it inside our controller. This is where magic happen. In order to see our label transforming, simply set text to it:
self.durationLabel.text = "--:--"
Run the app and you should see the label is nicely transforming to newly set text.
Animate Time Count Down
To achieve the counting down, we need another variable to keep track the value of the count down. Make it class variable:
var remainingTrackDuration = 0
Next, we make a function, which will do:
- Decrease value of count down variable by one
- Properly format value and set new text to the label
- Call itself again after 1 second
To call itself after a delay, we use dispatch_after macro and make the code to be called in main thread:
dispatch_after(dispatch_time(DISPATCH_TIME_NOW, Int64(1 * NSEC_PER_SEC)), dispatch_get_main_queue()) { () -> Void in
  // call the function itself here
}
Note the used parameters:
dispatch_time(): to create the delay between current time and delta value, which be one ofNSEC_PER_SEC, or 1 seconddispatch_get_main_queue(): to run the code on main thread
We do the formatting using NSString formatter, note that if we has counted to zero, we simply do not call our function again:
self.remainingTrackDuration--
if (self.remainingTrackDuration >= 0) {
  self.durationLabel.text = NSString(format: "%ld:%.2ld", self.remainingTrackDuration / 60, self.remainingTrackDuration % 60) as String
}
So, our function should be like this:
func runTrackDurationAnimation() {
  dispatch_after(dispatch_time(DISPATCH_TIME_NOW, Int64(1 * NSEC_PER_SEC)), dispatch_get_main_queue()) { () -> Void in
    self.remainingTrackDuration--
    if (self.remainingTrackDuration >= 0) {
      self.durationLabel.text = NSString(format: "%ld:%.2ld", self.remainingTrackDuration / 60, self.remainingTrackDuration % 60) as String
      self.runTrackDurationAnimation()
    }
  }
}
Now we can set an initial value for count down variable, then call above function from anywhere and see the label transforming.
Cancel Scheduled Task
With Objective-C, in order to cancel such task, we use do not use dispatch and GCD, but prefer performSelector:withObject:afterDelay: and later, we cancel it with cancelPreviousPerformRequestsWithTarget:. However we do not have such methods in Swift, so to cancel a dispatched task, we may want to use a third-party library like Async.
With Async, our previous method should be like this, note that we need to store the created Async as a class variable so we can cancel it anytime:
var pendingAsync: Async?

func runTrackDurationAnimation() {
  self.pendingAsync?.cancel()
  self.pendingAsync = Async.main(after: 1) { () -> Void in
    self.remainingTrackDuration--
    if (self.remainingTrackDuration >= 0) {
      self.durationLabel.text = NSString(format: "%ld:%.2ld", self.remainingTrackDuration / 60, self.remainingTrackDuration % 60) as String
      self.runTrackDurationAnimation()
    }
  }
}

func cancelTrackDurationAnimation() {
  self.pendingAsync?.cancel()
}
Do not forget to import the module:
import Async
Conclusion
Minor animation and details made our apps more awesome, we are continuing to share with you about more like this piece in near future. Say tuned!