
Create a Tag Flow Layout with UICollectionView

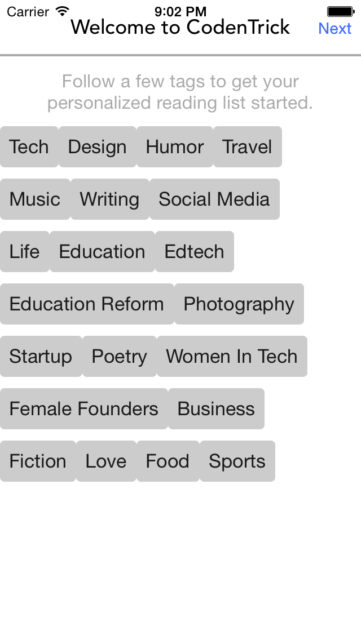
Before we start, take a look at what we will implement: a tag flow layout.
[om/content/images/2015/07/Following.png)
A flow layout, is a layout which element is placed horizontally until the row is full, then next element will be placed in start of next row. This layout is quite suitable for app which users should see a list of tags and select several one. As the photo above, users of Medium will select specific tags to follow up. In this tutorial, we will try to implement a layout which similar to Medium one. The idea is using UICollectionView of iOS and change the way it layout arrange element.
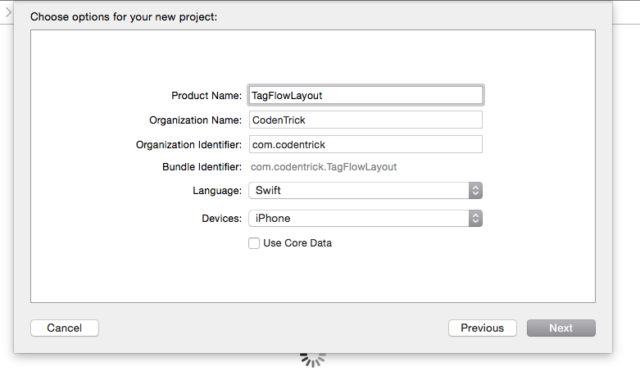
Begin with New Project
Now open XCode and create a new project based on Swift:
[ om/content/images/2015/07/FlowLayout_NewProject.png)
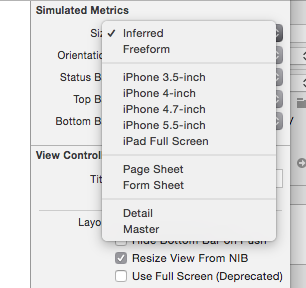
Open storyboard and change size of form to iPhone 4″ as usual, just for easier drag-n-drop:
[
Drag an UICollectionView and some labels to make it looks like Medium’s screen:
[om/content/images/2015/07/FlowLayout_Base.png)
Custom UICollectionViewCell
In next step, we will create a custom UICollectionViewCell and add to it an UILabel. Start with create a new xib file:
[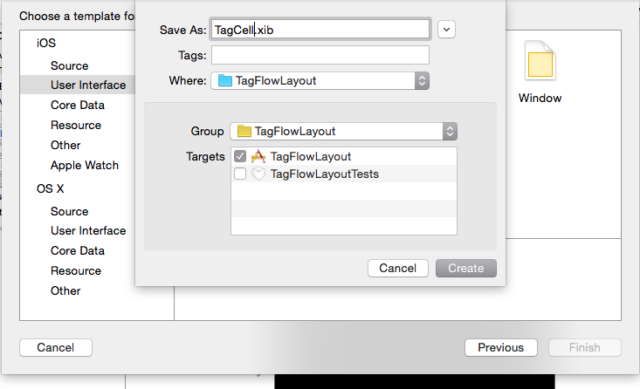 om/content/images/2015/07/FlowLayout_CreateCellLayout.png)
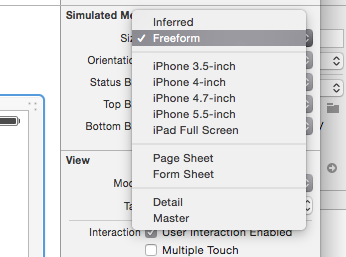
Change interface builder form to Free Form, so we can adjust size of cell dynamically:
[ Resize the form until you are happy, then add a label, with this layout, we need Auto Layout to come to ensure cell is correctly resized after:
[![FlowLayout_AddLabel]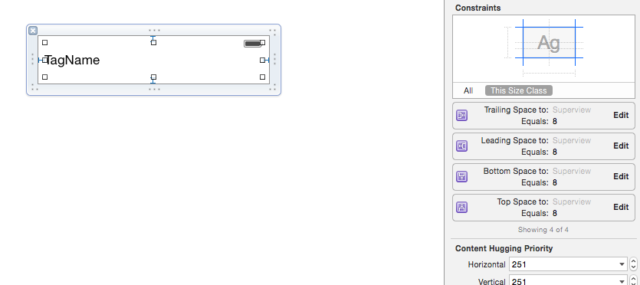 om/content/images/2015/07/FlowLayout_AddLabel.png)
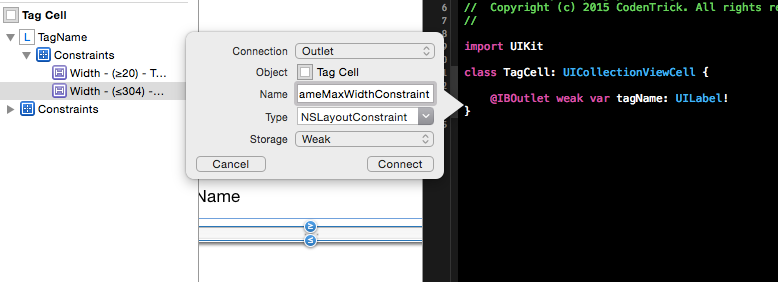
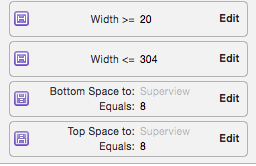
Next step is important, we will add two constraints to UILabel’s width to specify its minimum and maximum width. Note that while we can define minimum value by a constant, we have to dynamically calculate maximum value because of multiple screen sizes:
[
Next, we create a class for this cell:
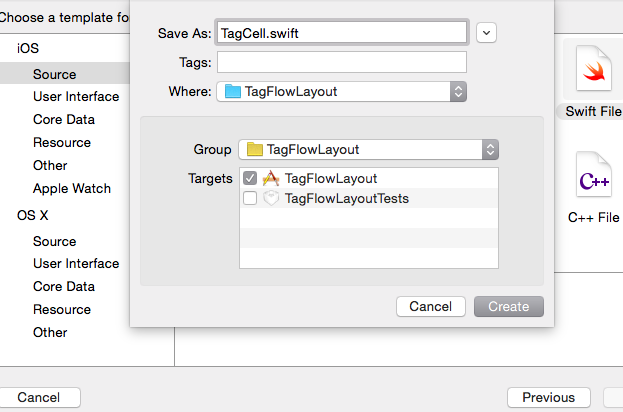
Open up TagCell.swift and create class declaration:
import UIKit class TagCell: UICollectionViewCell { }
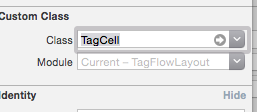
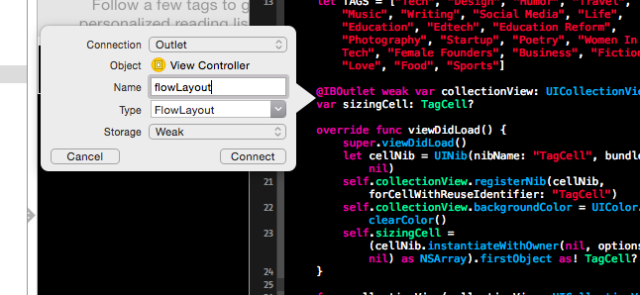
Next, we will create Outlet for label inside .xib file, and for maximum width constraint. First open TagCell.xib, select Identity Inspector and change View custom class to newly created TagCell class:
[
Drag Outlets for both label and its maximum width constraint:
[om/content/images/2015/07/FlowLayout_Outlet.png)
Override awakeFromNib function, as we give value to maximum width constraint, this value should be screen width, minus margin of cell, minus internal padding of cell, which 8pt:
override func awakeFromNib() {
  self.backgroundColor = UIColor(red: 0.8, green: 0.8, blue: 0.8, alpha: 1)
  self.tagName.textColor = UIColor(red: 0.1, green: 0.1, blue: 0.1, alpha: 1)
  self.layer.cornerRadius = 4
  self.tagNameMaxWidthConstraint.constant = UIScreen.mainScreen().bounds.width - 8 * 2 - 8 * 2 }
Create UICollectionView
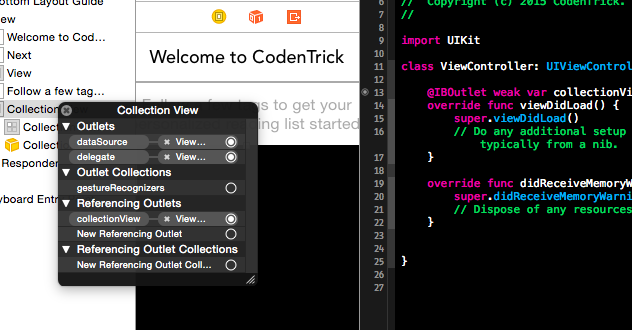
Back to our UICollectionView, open storyboard and create outlet for it, don’t forget to assign dataSource and delegate of UICollectionView to ViewController:
[
Now to ViewController.swift, we will pre-define an array of tag, and override required methods for UICollectionViewDataSource. We also register TagCell as nib to be reused with our collectionView:
class ViewController: UIViewController, UICollectionViewDataSource {
  let TAGS = ["Tech", "Design", "Humor", "Travel", "Music", "Writing", "Social Media", "Life", "Education", "Edtech", "Education Reform", "Photography", "Startup", "Poetry", "Women In Tech", "Female Founders", "Business", "Fiction", "Love", "Food", "Sports"]
  @IBOutlet weak var collectionView: UICollectionView!
  override func viewDidLoad() {
    super.viewDidLoad()
    let cellNib = UINib(nibName: "TagCell", bundle: nil)
    self.collectionView.registerNib(cellNib, forCellWithReuseIdentifier: "TagCell")
    self.collectionView.backgroundColor = UIColor.clearColor()
  }

  func collectionView(collectionView: UICollectionView, numberOfItemsInSection section: Int) -> Int {
    return TAGS.count
  }

  func collectionView(collectionView: UICollectionView, cellForItemAtIndexPath indexPath: NSIndexPath) -> UICollectionViewCell {
    var cell = collectionView.dequeueReusableCellWithReuseIdentifier("TagCell", forIndexPath: indexPath) as! TagCell
    self.configureCell(cell, forIndexPath: indexPath)
    return cell
  }

  func configureCell(cell: TagCell, forIndexPath indexPath: NSIndexPath) {
    let tag = TAGS[indexPath.row] cell.tagName.text = tag
  }
}
Run your project, and result should be as follow:
[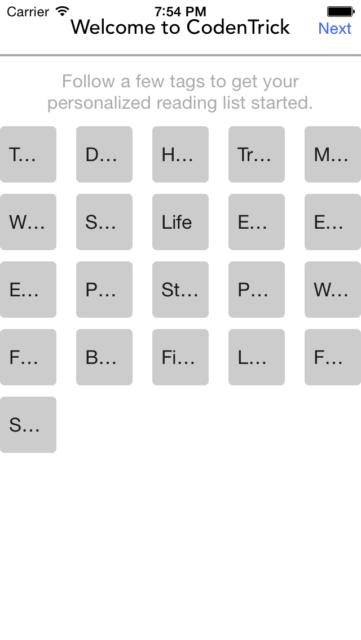 om/content/images/2015/07/FlowLayout_Firstresult.png)
Custom UICollectionViewLayout
In this step, we will create a custom layout for our collectionView which will be responsible to arrange element.
[ om/content/images/2015/07/FlowLayout_CustomLayout.png)
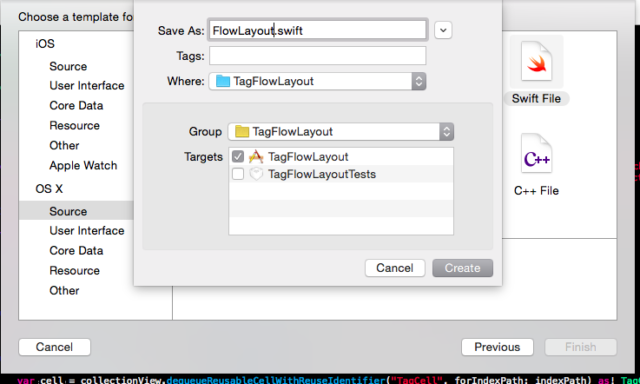
Open FlowLayout.swift, declare a subclass of UICollectionViewFlowLayout, layoutAttributesForElementsInRect function to calculate x position of next element inside array:
class FlowLayout: UICollectionViewFlowLayout {
override func layoutAttributesForElementsInRect(rect: CGRect) -> [AnyObject]? {
var attributesForElementsInRect = super.layoutAttributesForElementsInRect(rect)
var newAttributesForElementsInRect = [AnyObject]()
// use a value to keep track of left margin
var leftMargin: CGFloat = 0.0;
for attributes in attributesForElementsInRect! {
var refAttributes = attributes as! UICollectionViewLayoutAttributes
// assign value if next row
if (refAttributes.frame.origin.x == self.sectionInset.left) {
leftMargin = self.sectionInset.left
} else {
// set x position of attributes to current margin
var newLeftAlignedFrame = refAttributes.frame
newLeftAlignedFrame.origin.x = leftMargin
refAttributes.frame = newLeftAlignedFrame
}
// calculate new value for current margin
leftMargin += refAttributes.frame.size.width
newAttributesForElementsInRect.append(refAttributes)
}
return newAttributesForElementsInRect
}
}
```
Back to our `ViewController.swift`, we create a cell for calculating cell width based on tag length:
```
var sizingCell: TagCell?
```
In `viewDidLoad` method, we create this cell based on our already created nib:
```
self.sizingCell = (cellNib.instantiateWithOwner(nil, options: nil) as NSArray).firstObject as! TagCell?
```
Then override `sizeForItemAtIndexPath` method of `UICollectionViewFlowLayout`. This should create correct size for our cell:
```
func collectionView(collectionView: UICollectionView, layout collectionViewLayout: UICollectionViewLayout, sizeForItemAtIndexPath indexPath: NSIndexPath) -> CGSize {
self.configureCell(self.sizingCell!, forIndexPath: indexPath)
return self.sizingCell!.systemLayoutSizeFittingSize(UILayoutFittingCompressedSize)
}
```
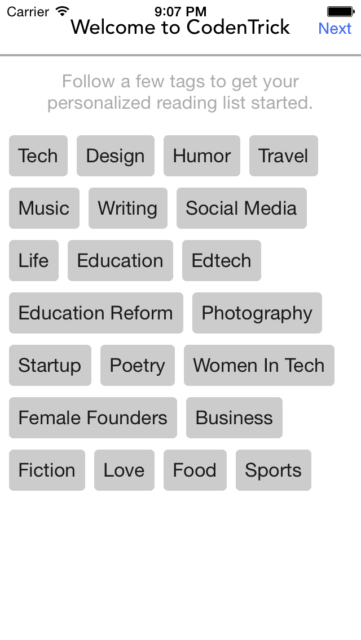
Run project again, and this should be result:
[](/content/images/2015/07/FlowLayout_NextResult.png)
It seems almost correct, we will add more horizontal spacing and inset to our collectionView later.
## Horizontal Spacing
Drag an Outlet from our Flow Layout inside storyboard to our `ViewController`:
[](/content/images/2015/07/FlowLayout_OutletLayout.png)
Back to our `ViewController.swift`, set a `sectionInset` to our flowLayout in `viewDidLoad`:
```
self.flowLayout.sectionInset = UIEdgeInsetsMake(8, 8, 8, 8)
```
Switch to our `FlowLayout.swift`, we will add a horizontal spacing value when recalculating `rightMargin`, change:
```
leftMargin += refAttributes.frame.size.width
```
to:
```
leftMargin += refAttributes.frame.size.width + 8
```
Then, our result should looks like this:
[](/content/images/2015/07/FlowLayout_DoneResult.png)
## Customize Selection
You may want to custom tag selection at this step. To do this, we should create a separate model class for the tag, which hold a name and a `Boolean` flag indicates if the tag is selected:
```
class Tag { var name: String? var selected = false }
```
We can loop through predefined tags and create an array of Tag:
```
var tags = [Tag]()
override func viewDidLoad() {
...
for name in TAGS {
var tag = Tag()
tag.name = name
self.tags.append(tag)
}
}
```
Then we change our `dataSource` function like this:
```
func collectionView(collectionView: UICollectionView, numberOfItemsInSection section: Int) -> Int {
return tags.count
}
func configureCell(cell: TagCell, forIndexPath indexPath: NSIndexPath) {
let tag = tags[indexPath.row]
cell.tagName.text = tag.name
cell.tagName.textColor = tag.selected ? UIColor.whiteColor() : UIColor(red: 0.1, green: 0.1, blue: 0.1, alpha: 1)
cell.backgroundColor = tag.selected ? UIColor(red: 0, green: 1, blue: 0, alpha: 1) : UIColor(red: 0.8, green: 0.8, blue: 0.8, alpha: 1)
}
```
Finally, add method to select a tag:
```
func collectionView(collectionView: UICollectionView, didSelectItemAtIndexPath indexPath: NSIndexPath) {
collectionView.deselectItemAtIndexPath(indexPath, animated: false)
tags[indexPath.row].selected = !tags[indexPath.row].selected
self.collectionView.reloadData()
}
```
And result:
[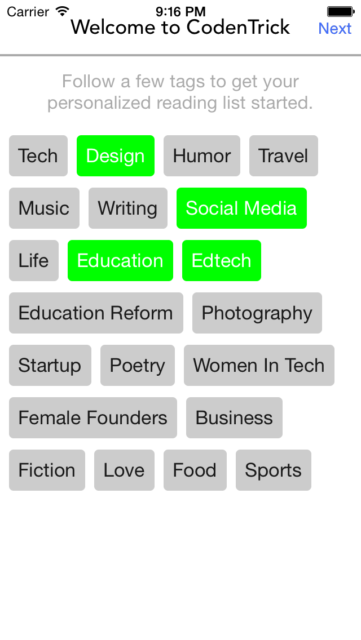](/content/images/2015/07/FlowLayout_FinalResult.png)
Now, all customizations like color, size and spacing are your! Please refer to source code at [GitHub](https://github.com/luceefer/TagFlowExample). Leave comment here or email me if you still have concern.