
Part 4: Android RecyclerView: Grid


RecyclerView: Grid
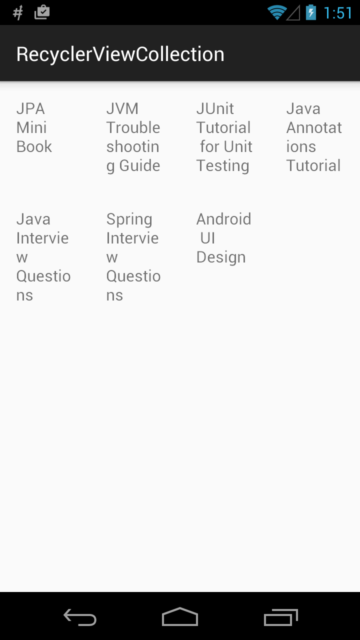
Using RecyclerView, we are free to use a predefined LayoutManager, or create our own manager to place and layout each item inside on screen. In this post, we want to talk about an alternative version of GridView on Android: RecyclerView: Grid. The result should look like this:
[om/content/images/2015/11/TheGrid.png)
To make our RecyclerView display a grid, we create and setup the Recycler as normal ListView:
Main Layout
<?xml version="1.0" encoding="utf-8"?>
<LinearLayout
  xmlns:android="http://schemas.android.com/apk/res/android"
  android:layout_width="match_parent"
  android:layout_height="match_parent">
  <android.support.v7.widget.RecyclerView
    android:id="@+id/recycler_view"
    android:layout_width="match_parent"
    android:layout_height="match_parent" />
</LinearLayout>
Item Layout
<?xml version="1.0" encoding="utf-8"?>
<TextView
  xmlns:android="http://schemas.android.com/apk/res/android"
  android:id="@+id/view_item_text"
  android:layout_width="match_parent"
  android:layout_height="wrap_content"
  android:orientation="vertical"
  android:padding="16dp"
  android:textSize="16sp" />
In our activity, we use simple holder and adapter for demonstration:
static class SimpleHolder extends RecyclerView.ViewHolder {
 TextView mTextView;
 public SimpleHolder(View itemView) {
  super(itemView);
  this.mTextView = (TextView) itemView.findViewById(R.id.view_item_text);
 }
}
class SimpleAdapter extends RecyclerView.Adapter < SimpleHolder > {
 @Override public int getItemCount() {
  return DataProvider.JAVA_BOOKS.length;
 }
 @Override public SimpleHolder onCreateViewHolder(ViewGroup viewGroup, int i) {
  View view = getLayoutInflater().inflate(R.layout.view_item, viewGroup, false);
  return new SimpleHolder(view);
 }
 @Override public void onBindViewHolder(SimpleHolder simpleHolder, int i) {
  simpleHolder.mTextView.setText(DataProvider.JAVA_BOOKS[i]);
 }
}
Back to our activity, in our onCreate() method, we give the RecyclerView a layout manager, and here we come: a GridLayoutManager will make our RecyclerView display a grid:
RecyclerView mRecyclerView = (RecyclerView) findViewById(R.id.recycler_view);
mRecyclerView.setLayoutManager(new GridLayoutManager(this, 3));
mRecyclerView.setAdapter(new SimpleAdapter());
Note the second parameter in GridLayoutManager constructor. That number will be our column count. So we will have three column in our grid. Now you can run the application and see the grid in action.
Auto-Column Span
You can note that the GridLayoutManager requires us to provide absolute column. That means, the RecyclerView will always keep that column count even if our device is larger, or we rotate it to landscape. We will want a layout that automatically maintains the column count based on screen width and item width, which auto value of GridView give us. To do that, we will extend the GridLayoutManager and manually calculate suitable column count for current device:
public static class GridAutofitLayoutManager extends GridLayoutManager {
 private int mColumnWidth;
 private boolean mColumnWidthChanged = true;
 public GridAutofitLayoutManager(Context context, int columnWidth) {
  super(context, 1);
  setColumnWidth(checkedColumnWidth(context, columnWidth));
 }
 public GridAutofitLayoutManager(Context context, int columnWidth, int orientation, boolean reverseLayout) { /* Initially set spanCount to 1, will be changed automatically later. */
  super(context, 1, orientation, reverseLayout);
  setColumnWidth(checkedColumnWidth(context, columnWidth));
 }
 private int checkedColumnWidth(Context context, int columnWidth) {
  if (columnWidth <= 0) { /* Set default columnWidth value (48dp here). It is better to move this constant to static constant on top, but we need context to convert it to dp, so can't really do so. */
   columnWidth = (int) TypedValue.applyDimension(TypedValue.COMPLEX_UNIT_DIP, 48, context.getResources().getDisplayMetrics());
  }
  return columnWidth;
 }
 public void setColumnWidth(int newColumnWidth) {
  if (newColumnWidth > 0 && newColumnWidth != mColumnWidth) {
   mColumnWidth = newColumnWidth;
   mColumnWidthChanged = true;
  }
 }
 @Override public void onLayoutChildren(RecyclerView.Recycler recycler, RecyclerView.State state) {
  if (mColumnWidthChanged && mColumnWidth > 0) {
   int totalSpace;
   if (getOrientation() == VERTICAL) {
    totalSpace = getWidth() - getPaddingRight() - getPaddingLeft();
   } else {
    totalSpace = getHeight() - getPaddingTop() - getPaddingBottom();
   }
   int spanCount = Math.max(1, totalSpace / mColumnWidth);
   setSpanCount(spanCount);
   mColumnWidthChanged = false;
  }
  super.onLayoutChildren(recycler, state);
 }
}
Our setup for RecyclerView will become:
GridAutofitLayoutManager layoutManager = new GridAutofitLayoutManager(this, 160);
RecyclerView mRecyclerView = (RecyclerView) findViewById(R.id.recycler_view);
mRecyclerView.setLayoutManager(layoutManager);
mRecyclerView.setAdapter(new SimpleAdapter());
Run the app and see the result with device in portrait and landscape modes:
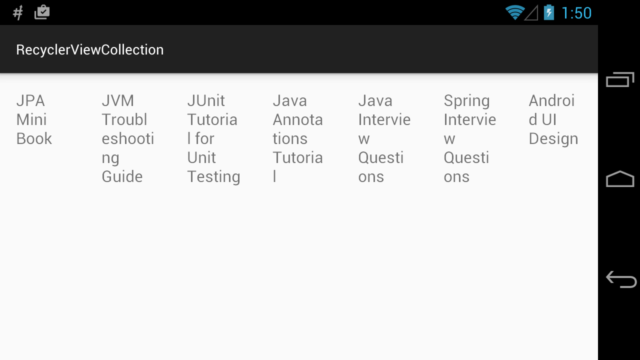
You can visit current project with reference to GridLayoutManager auto-column here.