
Using Shimmer Effect to Indicate Music Buffering in iOS

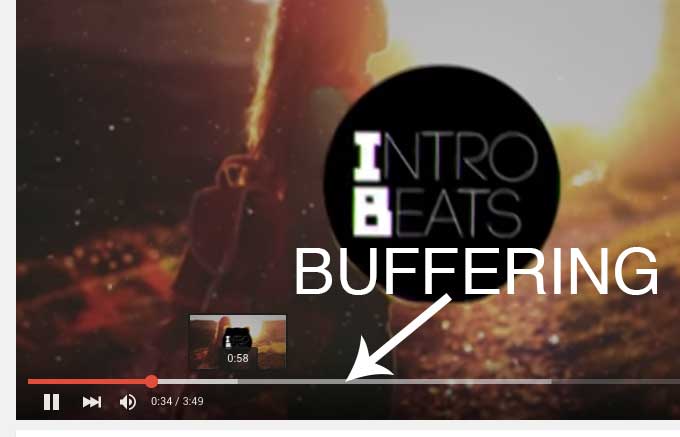
While developing a music app, which play your songs over the internet, you are likely to meet a normal case, if your music need to be buffered before it can be playable. You can open a random YouTube video and see the buffer indicator like this:
[om/content/images/2015/08/Buffer_YouTube.jpg)
So with normal music, which is played over the network. In this tutorial, you will learn to play a song from an url, then use a text as song name, with Shimmer effect to indicate the buffering progress.
Shimmer Effect
The name Shimmer is belong to Facebook:
Shimmer is an easy way to add a shimmering effect to any view in your app. It’s useful as an unobtrusive loading indicator.
Shimmer was originally developed to show loading status in Paper.

Create a New Project
As we are creating a new project, use Swift for your language:
[om/content/images/2015/08/Buffer_NewProject.png)
We are going to use CocoaPods to add Shimmer library, so make sure your OS X has CocoaPods installed. If not, visit CocoaPods home page to install it right now.
Open your Terminal, navigate to your project directory and enable CocoaPods:
Dieps-1st-Air:~ Luceefer$ cd Desktop/ShimmerBuffering/
Dieps-1st-Air:ShimmerBuffering Luceefer$ pod init
Dieps-1st-Air:ShimmerBuffering Luceefer$ nano Podfile
Remove all contents and replace by:
source 'https://github.com/CocoaPods/Specs.git'
platform :ios, '8.0'
use_frameworks!

pod 'Shimmer'
Then run pod install against your work directory. After CocoaPods has done it work, close your current XCode project, and reopen the project using .xcworkspace file instead. Press Cmd + B to build project and make Shimmer available to your interface builder.
Add Shimmer to Layout
Open up your storyboard and add a View with custom class to be set by FBShimmeringView:
[om/content/images/2015/08/Buffer_AddShimmer.png)
Connect the view to an outlet inside your ViewController:
@IBOutlet weak var shimmeringView: FBShimmeringView!
Do not forget to import the module:
import Shimmer
Then, in your viewDidLoad method, add the following code to setup your Shimmer:
override func viewDidLoad() {
  super.viewDidLoad()
  let label = UILabel(frame: self.shimmeringView.bounds)
  label.textAlignment = .Center
  label.text = "A Song For You"
  self.shimmeringView.contentView = label
  self.shimmeringView.shimmering = true
}
Run your project now and see its effect:

Play the Music
You have see the shiny Shimmer on your label. Now we will add the sound part.
First, find your favorite online link of a song, here I will use the following link:
Disclaimer: this song belongs to its artist, and is refered from here.
In our ViewController, init the AVQueuePlayer and add the song by its URL:
import AVFoundation
Create a class variable for our AVQueuePlayer:
let queuePlayer = AVQueuePlayer()
var songItem: AVPlayerItem?
Then, inside our viewDidLoad:
let streamUrl = "http://bit.ly/1h1PYoh"
songItem = AVPlayerItem(URL: NSURL(string: streamUrl))
queuePlayer.insertItem(songItem, afterItem: nil)
queuePlayer.play()
Run the app and you will hear music playing. Note that if you are running the app with simulator, you should need your Mac to be connected with an audio output.
Buffering Part
To take care of buffering part within an AVPlayerItem, we need to observer for two keys of it: playbackBufferEmpty and playbackLikelyToKeepup:
songItem?.addObserver(self, forKeyPath: "playbackBufferEmpty", options: .New, context: nil)
songItem?.addObserver(self, forKeyPath: "playbackLikelyToKeepUp", options: .New, context: nil)
NSNotificationCenter.defaultCenter().addObserver(self, selector: "itemDidFinishPlaying:", name: AVPlayerItemDidPlayToEndTimeNotification, object: songItem)
Note that we need to observer the AVPlayerItemDidPlayToEndTimeNotification to remove observation to avoid our app crashing if the AVPlayerItem is garbage collected. Now the handler part:
override func observeValueForKeyPath(keyPath: String, ofObject object: AnyObject, change: [NSObject : AnyObject], context: UnsafeMutablePointer<Void>) {
  if let item = object as? AVPlayerItem {
    if (keyPath == "playbackBufferEmpty") {
      if (item.playbackBufferEmpty) {
        self.shimmeringView.shimmering = true
      }
    } else if (keyPath == "playbackLikelyToKeepUp") {
      if (item.playbackLikelyToKeepUp) {
        self.shimmeringView.shimmering = false
      }
    }
  }
}
You can see that we check if the object is an AVPlayerItem first, then we check for the key paths and finally, we enable Shimmering, if playbackBufferEmpty is true, mean the item need more buffer, and if playbackLikelyToKeepup is true, we disable the shimmering view.
Finally, we remove observation and notification handler when the song is over:
func itemDidFinishPlaying(notification: NSNotification) {
  NSNotificationCenter.defaultCenter().removeObserver(self, name: AVPlayerItemDidPlayToEndTimeNotification, object: notification.object)
  self.songItem?.removeObserver(self, forKeyPath: "playbackBufferEmpty")
  self.songItem?.removeObserver(self, forKeyPath: "playbackLikelyToKeepUp")
}
Now, run the project and see, whenever your song is buffering, your label should shine shimmerly.
You can find source code for the project here.