
Android Custom View: Extend Standard Views

The Android platform provides an extensive range of user interface items that are sufficient for the needs of most apps. However, there may be occasions on which you feel the need to implement a custom user interface for a project you are working on.
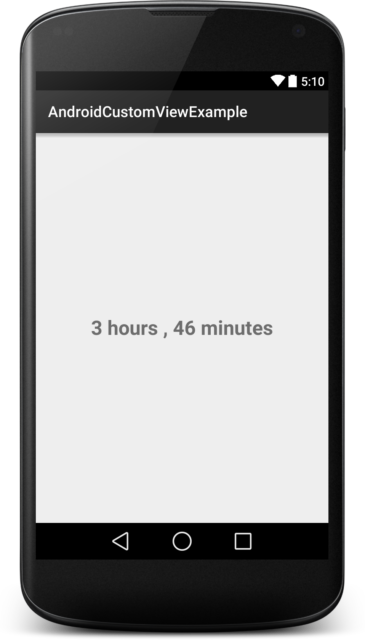
13555 seconds = 3 hours, 46 minutes
43288 seconds = 12 hours, 1 minute
In this article, I will show to you how to create an Android custom view. To create and use our custom view in Android application, we need:
- Create a Class extend the View class.
- Create Attribute Resources
- Add the View to the Layout
- Retrieve the Attributes
- Adding presentation login
- Manipulate the View from the Activity
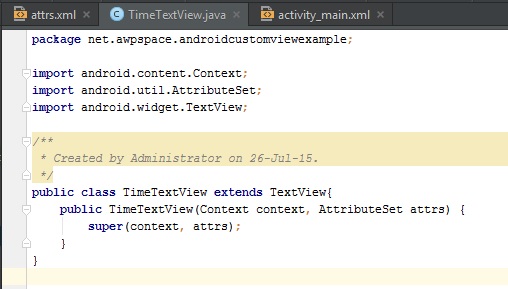
Create a Class extend the View class
We need create a class TimeTextView, that extend the TextView class. We include a contructor which will create our custom view from XML layout file:
[
Create Attribute Resources
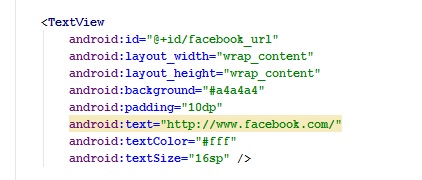
Each view has a number of attributes that we can set in our layout files. Here’s an example of Android’s Button view as declared in an XML file:
[
We define our custom attributes in an XML file, res/values/attrs.xml
Add the View to the Layout
Now we can declare our custom view in our layout file:
<RelativeLayout
  xmlns:android="http://schemas.android.com/apk/res/android"
  xmlns:custom="http://schemas.android.com/apk/res-auto"
  xmlns:tools="http://schemas.android.com/tools"
  android:layout_width="match_parent"
  android:layout_height="match_parent"
  tools:context=".MainActivity">
    <net.awpspace.androidcustomviewexample.TimeTextView
      android:layout_width="wrap_content"
      android:layout_height="wrap_content"
      android:layout_centerInParent="true"
      custom:duration="13555" />
</RelativeLayout>

When declare our TimeTextView in our layout we can include it’s attributes which we define in attribute file res/values/attrs.xml. We need to include the namespace for our custom view as indicate by the line 2.
Retrieve the Attributes
private int duration;
public TimeTextView(Context context, AttributeSet attrs) {
 super(context, attrs);
 TypedArray a = context.getTheme().obtainStyledAttributes(attrs, R.styleable.TimeTextView, 0, 0);
 try {
  duration = a.getInteger(R.styleable.TimeTextView_duration, 0);
 } finally {
  a.recycle();
 }
 setDuration(duration);
}
Adding presentation login
Add method called setDuration to the view
 int hours;
 int minutes;
 public void setDuration(float duration) {
  int durationInMinutes = Math.round(duration / 60);
  hours = durationInMinutes / 60;
  minutes = durationInMinutes % 60;
  String hourText = "";
  String minuteText = "";
  if (hours > 0) {
   hourText = hours + (hours == 1 ? " hour " : " hours ");
  }
  if (minutes > 0) {
   minuteText = minutes + (minutes == 1 ? " minute" : " minutes");
  }
  if (hours == 0 && minutes == 0) {
   minuteText = "less than 1 minute";
  }
  String durationText = hourText + ", " + minuteText;
  setText(Html.fromHtml(durationText), BufferType.SPANNABLE);
 }
Manipulate the View from the Activity
Now, we can use our custom view in Activity:
 private TimeTextView mTimeTextView;
 @Override protected void onCreate(Bundle savedInstanceState) {
  super.onCreate(savedInstanceState);
  setContentView(R.layout.activity_main);
  mTimeTextView = (TimeTextView) findViewById(R.id.myTimeTextView);
  mTimeTextView.setDuration(43288);
 }
Conclusion
In this article, we are learned how to make a simple custom view on Android.
Complete source code in here: Github