Get SHA1 Code for Implementing Google Maps on Android
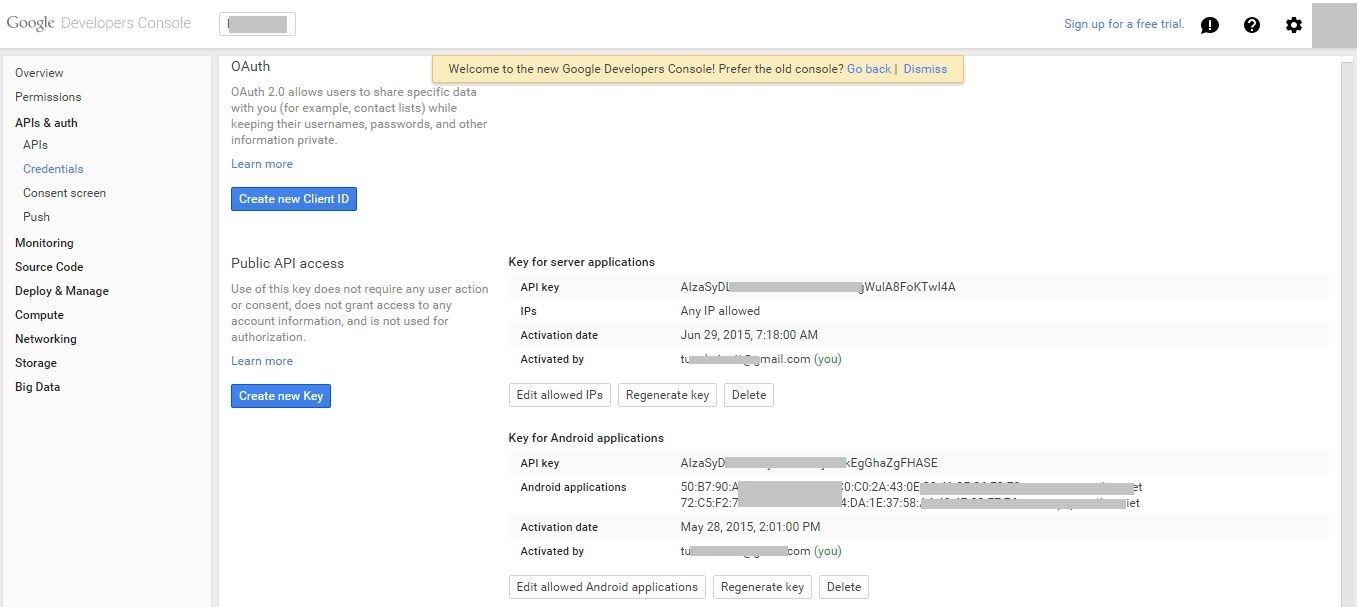
If you intend implement Google Maps on Android application, you must have a Google Maps API key. To use the Google Maps Android API v2, you must register your app project on the Google Developers Console and get a Google API key which you can add to your app.
Arcording to developers.google.com:
The API key is based on a short form of your app’s digital certificate, known as its SHA-1 fingerprint. To display the SHA-1 fingerprint for your certificate, first ensure that you are using the right certificate. You may have two certificates:
- A debug certificate: The Android SDK tools generate this certificate automatically when you do a debug build. Only use this certificate with apps that you’re testing. Do not attempt to publish an app that’s signed with a debug certificate.
- A release certificate: The Android SDK tools generate this certificate when you do a release build. You can also generate this certificate using the
keytoolprogram. Use this certificate when you are ready to release your app to the world.
Follow the steps below to display a certificate’s SHA-1 fingerprint using the keytool program with the -vparameter.
DEBUG CERTIFICATE
Locate your debug keystore file. The file name is debug.keystore, and is created the first time you build your project. By default, it is stored in the same directory as your Android Virtual Device (AVD) files:
- OS X and Linux:
/.android/ - Windows Vista and Windows 7:
C:\Users\your_user_name\.android\
If you are using Eclipse with ADT, and you’re not sure where your debug keystore is located, you can select Windows >Prefs > Android > Build to check the full path.
List the SHA-1 fingerprint:
- For Linux or OS X, open a terminal window and enter the following:
keytool -list -v -keystore ~/.android/debug.keystore -alias androiddebugkey -storepass android -keypass android
- For Windows Vista and Windows 7, run:
keytool -list -v -keystore "%USERPROFILE%\.android\debug.keystore" -alias androiddebugkey -storepass android -keypass android
You should see output similar to this:
Alias name: androiddebugkey Creation date: Jan 01, 2013 Entry type: PrivateKeyEntry Certificate chain length: 1 Certificate[1]: Owner: CN=Android Debug, O=Android, C=US Issuer: CN=Android Debug, O=Android, C=US Serial number: 4aa9b300 Valid from: Mon Jan 01 08:04:04 UTC 2013 until: Mon Jan 01 18:04:04 PST 2033 Certificate fingerprints: MD5: AE:9F:95:D0:A6:86:89:BC:A8:70:BA:34:FF:6A:AC:F9 SHA1: BB:0D:AC:74:D3:21:E1:43:07:71:9B:62:90:AF:A1:66:6E:44:5D:75 Signature algorithm name: SHA1withRSA Version: 3
The line that begins with SHA1 contains the certificate’s SHA-1 fingerprint. The fingerprint is the sequence of 20 two-digit hexadecimal numbers separated by colons.
RELEASE CERTIFICATE
Locate your release certificate keystore file. There is no default location or name for the release keystore. If you don’t specify one when you build your app for release, the build will leave your .apk unsigned, and you’ll have to sign it before you can publish it. For the release certificate, you also need the certificate’s alias and the passwords for the keystore and the certificate. You can list the aliases for all the keys in a keystore by entering:
keytool -list -keystore your_keystore_name
Replace your_keystore_name with the fully-qualified path and name of the keystore, including the .keystoreextension. You’ll be prompted for the keystore’s password. Then keytool displays all the aliases in the keystore.
Enter the following at a terminal or command prompt:
keytool -list -v -keystore your_keystore_name -alias your_alias_name
Replace your_keystore_name with the fully-qualified path and name of the keystore, including the .keystore extension. Replace your_alias_name with the alias that you assigned to the certificate when you created it.
You should see output similar to this:
Alias name: <alias_name> Creation date: Feb 02, 2013 Entry type: PrivateKeyEntry Certificate chain length: 1 Certificate[1]: Owner: CN=Android Debug, O=Android, C=US Issuer: CN=Android Debug, O=Android, C=US Serial number: 4cc9b300 Valid from: Mon Feb 02 08:01:04 UTC 2013 until: Mon Feb 02 18:05:04 PST 2033 Certificate fingerprints: MD5: AE:9F:95:D0:A6:86:89:BC:A8:70:BA:34:FF:6B:AC:F9 SHA1: BB:0D:AC:74:D3:21:E1:43:67:71:9B:62:90:AF:A1:66:6E:44:5D:75 Signature algorithm name: SHA1withRSA Version: 3
The line that begins with SHA1 contains the certificate’s SHA-1 fingerprint. The fingerprint is the sequence of 20 two-digit hexadecimal numbers separated by colons.
But I don’t like use command line interface, I have a trick for get SHA-1 on Eclipse and Android Studio.
With Eclipse (Android ADT Bundle)
Step 1: Right click on your project -> Export
[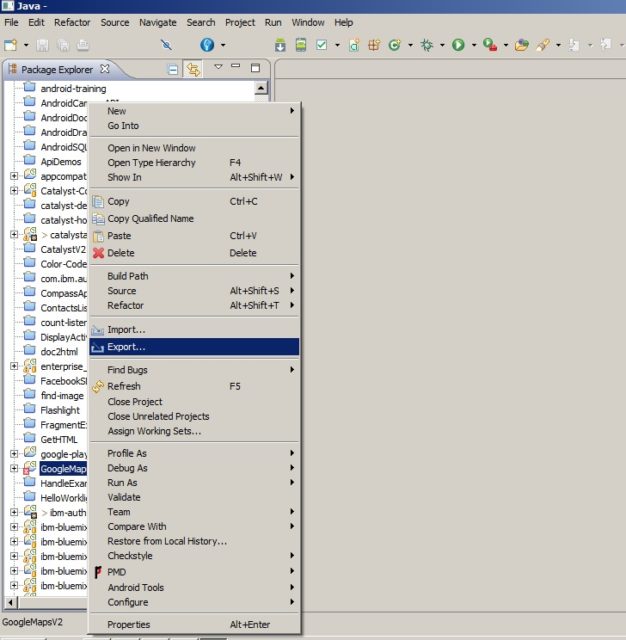 com/content/images/2015/07/android_how_to_get_sha1_key_eclipse_1.jpg)
Step 2: Select “Export Android Application” and Next[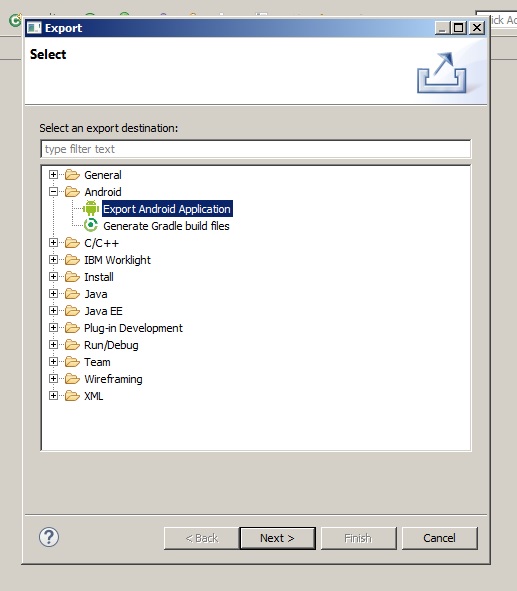
Step 3: Select project and Next, in new windows Browse to keystore debug or release, enter password for the keystore and Next[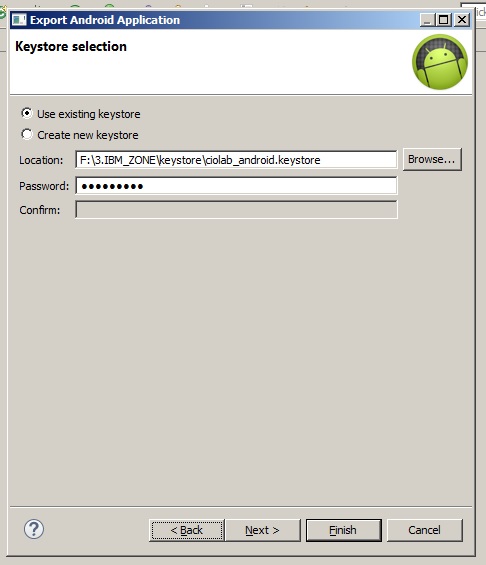
Step 4: In the final windows, you can show certificate fingerprints[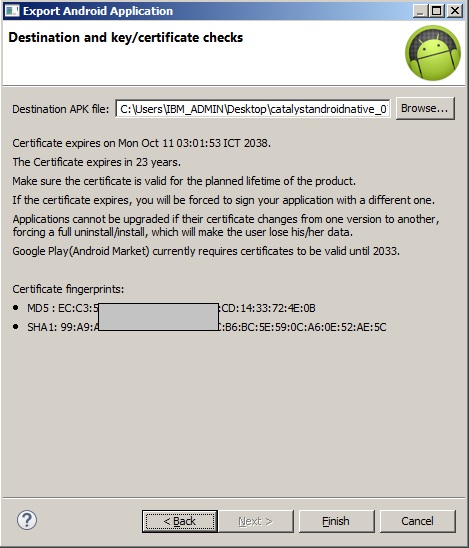
With Android Studio
Step 1: Create new Google Maps Activity
[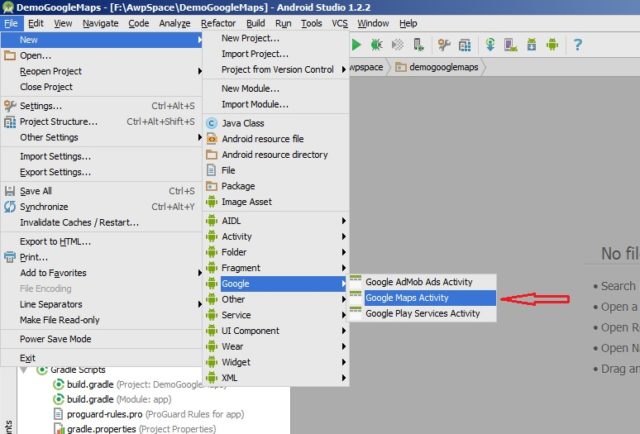 om/content/images/2015/07/android_how_to_get_sha1_key_as_1.jpg)
Step 2: Enter name for Google Maps Activity
[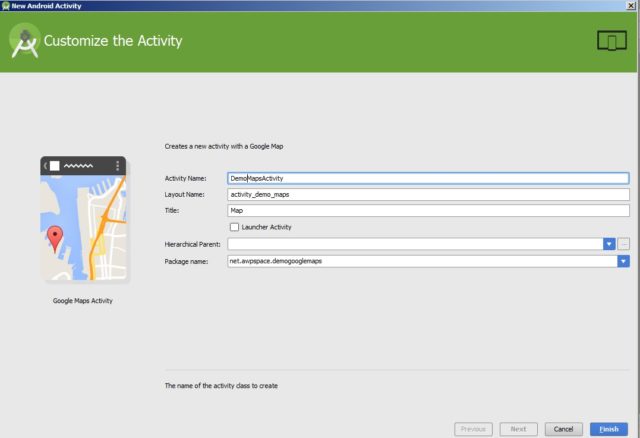 om/content/images/2015/07/android_how_to_get_sha1_key_as_2.jpg)
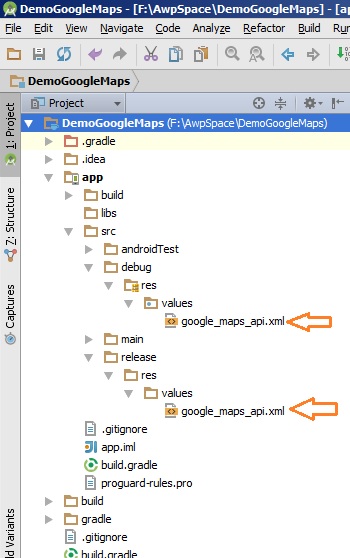
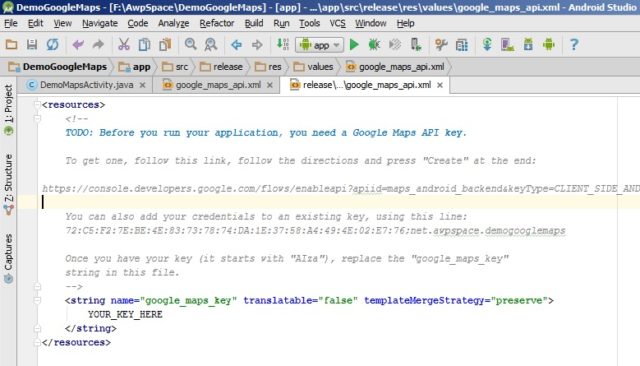
After step 2, Android Studio generated a xml file google_maps_api.xml.
[ om/content/images/2015/07/android_how_to_get_sha1_key_as_3.jpg)
In google_maps_api.xml file, you can get SHA-1 key.
Notes: In your project contain 2 file google_maps_api.xml for debug and release mode
[