
Getting started with Nearby Messages API on Android
Get started
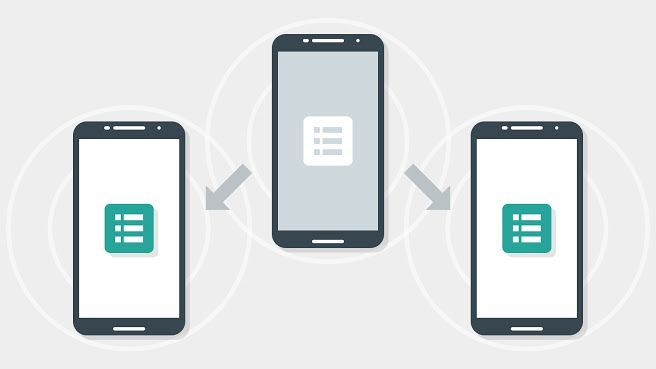
This document explains how to start developing with the Nearby Messages API on Android. The Nearby Messages API is part of Google Play services.
Step 1: Get Google Play services
The Nearby Messages API is available on Android devices with Google Play services 7.8.0 or height. Ensure that you have the lastest client library for Google Play services on your development host:
Step 2: Get a Google account
To use the Nearby Messages APIs, you need a Google account. If you already have an account, then you’re all set.
Step 3: Get an API key
Take these steps to activete the Google Nearby Messages API for Android for your project on the Google Develpers Console:
- Visit Google Develpers Console the to create a new project, or select an existing project.
- Activete the Nearby Messages API
- Register the public certificate from app’s signed APK
- Create an Android API key
This step is quite straightforward, I think you can do it. If you have never been do same task, you can get tutorials on Google search 😀
Step 4: Configure your project
You need add Google Play services to your project. Open build.gradle file and add the Google Play services client library as a dependency:
dependencies {
  compile 'com.google.android.gms:play-services:7.8.0'
}
Then, configure your manifest with the API Key generated in the previous step:
<manifest
  xmlns:android="http://schemas.android.com/apk/res/android"
  package="com.google.sample.app">
  <application ...>
    <meta-data
      android:name="com.google.android.nearby.messages.API_KEY"
      android:value="API_KEY" />
    <activity>
      ...
    </activity>
  </application>
</manifest>
Step 5: Connect to the Nearby Messages service
In your app, create a GoogleApiClient and add the Nearby Messages Api. The following snippet shows how to add the Nearby Messages API:
mGoogleApiClient = new GoogleApiClient.Builder(this) .addApi(Nearby.MESSAGES_API).addConnectionCallbacks(this).addOnConnectionFailedListener(this).build();
Publish and Subscribe
Publish a message
To publish a message, call
Nearby.Messages.publish()
passing your message byte array, as shown in the following snippet:
// Publish bytes to send message = new Message(yourByteArray);
Nearby.Messages.publish(mGoogleApiClient, message).setResultCallback(new ErrorCheckingCallback("publish()"));
When calling Nearby.Messages.publish, you must implement a ResultCallback, and call setResultCallback() to handle any status codes resulting from the operation.
Subscribe to messages
To subscribe to and retrieve messages, create an instance of MessageListener, then call Nearby.Messages.subscribe(), as shown in the following snippet:
// Create an instance of MessageListener
messageListener = new MessageListener() {
 @Override public void onFound(final Message message) {
  // Do something with message.getContent()
 }
};
// Subscribe to receive messages
Nearby.Messages.subscribe(mGoogleApiClient, messageListener).setResultCallback(new ErrorCheckingCallback("subscribe()"));
When calling Nearby.Messages.subscribe, you must implement a ResultCallback, and call setResultCallback() to handle any status codes resulting from the operation.
Pub/Sub example
The following example app code demonstrates the entire publish-subscribe flow.
@Override protected void onStart() {
 super.onStart();
 if (!mGoogleApiClient.isConnected()) {
  mGoogleApiClient.connect();
 }
}
@Override protected void onStop() {
  if (mGoogleApiClient.isConnected()) {
   // Clean up when the user leaves the activity.
   Nearby.Messages.unpublish(mGoogleApiClient, mMessage).setResultCallback(new ErrorCheckingCallback("unpublish()"));
   Nearby.Messages.unsubscribe(mGoogleApiClient, mMessageListener).setResultCallback(new ErrorCheckingCallback("unsubscribe()"));
  }
  mGoogleApiClient.disconnect();
  super.onStop();
 }
 // GoogleApiClient connection callback.
@Override public void onConnected(Bundle connectionHint) {
  Nearby.Messages.getPermissionStatus(mGoogleApiClient).setResultCallback(new ErrorCheckingCallback("getPermissionStatus", new Runnable() {
   @Override public void run() {
    publishAndSubscribe();
   }
  }));
 }
 // This is called in response to a button tap in the Nearby permission dialog.
@Override protected void onActivityResult(int requestCode, int resultCode, Intent data) {
 super.onActivityResult(requestCode, resultCode, data);
 if (requestCode == REQUEST_RESOLVE_ERROR) {
  mResolvingError = false;
  if (resultCode == RESULT_OK) {
   // Permission granted or error resolved successfully then we proceed
   // with publish and subscribe..
   publishAndSubscribe();
  } else {
   // This may mean that user had rejected to grant nearby permission.
   showToast("Failed to resolve error with code " + resultCode);
  }
 }
}
private void publishAndSubscribe() {
 // We automatically subscribe to messages from nearby devices once
 // GoogleApiClient is connected. If we arrive here more than once during
 // an activity's lifetime, we may end up with multiple calls to
 // subscribe(). Repeated subscriptions using the same MessageListener
 // are ignored.
 Nearby.Messages.publish(mGoogleApiClient, mMessage).setResultCallback(new ErrorCheckingCallback("publish()"));
 Nearby.Messages.subscribe(mGoogleApiClient, mMessageListener).setResultCallback(new ErrorCheckingCallback("subscribe()"));
} /** * A simple ResultCallback that displays a toast when errors occur. * It also displays the Nearby opt-in dialog when necessary. */
private class ErrorCheckingCallback implements ResultCallback < Status > {
 private final String method;private final Runnable runOnSuccess;private ErrorCheckingCallback(String method) {
  this(method, null);
 }
 private ErrorCheckingCallback(String method, @Nullable Runnable runOnSuccess) {
  this.method = method;
  this.runOnSuccess = runOnSuccess;
 }
 @Override public void onResult(@NonNull Status status) {
  if (status.isSuccess()) {
   Log.i(TAG, method + " succeeded.");
   if (runOnSuccess != null) {
    runOnSuccess.run();
   }
  } else {
   // Currently, the only resolvable error is that the device is not opted
   // in to Nearby. Starting the resolution displays an opt-in dialog.
   if (status.hasResolution()) {
    if (!mResolvingError) {
     try {
      status.startResolutionForResult(MainActivity.this, REQUEST_RESOLVE_ERROR);
      mResolvingError = true;
     } catch (IntentSender.SendIntentException e) {
      showToastAndLog(Log.ERROR, method + " failed with exception: " + e);
     }
    } else {
     // This will be encountered on initial startup because we do
     // both publish and subscribe together. So having a toast while
     // resolving dialog is in progress is confusing, so just log it.
     Log.i(TAG, method + " failed with status: " + status + " while resolving error.");
    }
   } else {
    showToastAndLog(Log.ERROR, method + " failed with : " + status + " resolving error: " + mResolvingError);
   }
  }
 }
}
Get Beacon Message
Your app can subscribe to Bluetooth Low Energy (BLE) beacons. When subscribing, your app will automatically receive any messages that you’ve attached to BLE beacons, in addition to any messages published by your app on other devices.
The following code snippet demonstrates subscribing to messages attached to BLE beacons.
MessageListener messageListener = new MessageListener() {
 // Called each time a new message is discovered nearby.
 @Override public void onFound(Message message) {
   Log.i(TAG, "Found message: " + message);
  }
  // Called when a message is no longer nearby.
 @Override public void onLost(Message message) {
  Log.i(TAG, "Lost message: " + message);
 }
};
// Subscribe to receive nearby messages created by this Developer Console project.
// Use Strategy.BLE_ONLY because we are only interested in messages that we
// attached to BLE beacons.
Nearby.Messages.subscribe(client, messageListener, Strategy.BLE_ONLY).setResultCallback(new ErrorCheckingCallback("subscribe()"));
When calling Nearby.Messages.subscribe, you must implement a ResultCallback, and call setResultCallback() to handle any status codes resulting from the operation.
Notes:
- To conserve batteru life, call
Nearby.Messages.unsubscribe()in your Activity’sonStop()function. - To reduce latency, use the
Strategy.BLE_ONLYoption. This option is used when callingNearby.Messages.subscribe(). When this option is set, Nearby Messages API won’t trigger WiFi scans or classic Bluetooth scans. This improves the latency for beacon detection since the system doesn’t cycle through all of the possition scan types. - To attach a message payload to a beacon, use the Proximity Beacon API.
Parsing beacon messages
Beacon attachments are blobs of arbitrary date that you can add to beacons. Each attachment consists of the following parts:
- Namespace: A namespace identitier
- Type: The date type
- Data: The data value for the attachment
The following code snippet demonstrates getting the namespace, data and data type from a beacon message:
public void onFound(Message message) {
 String nearbyMessageNamespace = message.getNamespace();
 String nearbyMessageType = message.getType();
 String nearbyMessageString = new String(message.getContent());
 Log.i(TAG, "Message string: " + nearbyMessageString);
 Log.i(TAG, "Message namespaced type: " + nearbyMessageNamespace + "/" + nearbyMessageType);
}