
Multi-Container Application Deployment with Docker


Today we want to create a Docker real application involving multiple container, then push to public repository and use those images to deploy an application in an AWS EC2 instance. Before start, you can take a look at previous posts about Docker:
- Docker – A New Way for Shipping Application
- Basic Usecase with Docker: Simple PHP Application
- Advanced Usecase with Docker: Connecting Containers
- Production-Ready Environment with Docker
In overview, we will do the following steps:
- Setup Docker on local machine: here I use OS X, so Docker will be installed by using boot2docker
- Create image for: Redis to be used as database, Node to be used as web-server and Nginx to be used as load balancer
- Test build on local machine with docker-compose
- Push those images to public repository
- Launch an Ubuntu-based AWS EC2 instance
- Install Docker & Docker Compose to this instance
- Launch application by declare a docker-compose.yml
Setup Docker on Local
Install Docker is quite simple. In my case, I just go to boot2docker/osx-installer release page, then download Boot2Docker and install it.
Note that version 1.7.0 of Boot2Docker has problem with certificate which can lead to unstable docker-vm. If you are using version 1.7.0 and below, please update to 1.7.1 to avoid these problem, which made me annoy in about several hours.
Create Images
Take a look at the following figure. We will create three images to use, with Node image, it should be built to 3 container for nginx to use with load balancer:
[
We will have working directory structure as follow:

Create Redis Image
As Redis already have an official image in Docker Hub, we can directly use this image when defining inside docker-compose.yml. However, if you want to manually create your own Redis image, you can have it by declare the following Dockerfile:
# Set the base image to Ubuntu
FROM ubuntu
# Update the repository and install Redis Server
RUN apt-get update && apt-get install -y redis-server
# Expose Redis port 6379
EXPOSE 6379
# Run Redis Server
ENTRYPOINT ["/usr/bin/redis-server"]
We will build this image later.
Create Node Image
Our application will have a very simple feature: It can count page view of itself. To do this, we store page count value into redis and increment it whenever a request was made to our server. We create a Node application by using:
$ npm init
Then enter a few needed information and with entry point, I prefer the name app.js instead of default one index.js. As we are using Express to create our http server and Redis, we will need corresponding dependencies, install it by:
$ npm install express --save $ npm install redis --save
–save will ensure our dependencies are written into package.json file. Then our app.js will have the following contents:
// Require dependencies
var express = require('express'),
  http = require('http'),
  redis = require('redis');

// Create Express app
var app = express();

// Docker creates host entry for us, which will be named by Docker Compose linkage, here it is "redis" and default port is 6379
var client = redis.createClient('6379', 'redis');

// Express route
app.get('/', function(req, res, next) {
  client.incr('counter', function(err, counter) {
    if(err) return next(err);
    res.send('This page has been viewed ' + counter + ' times!');
  });
});

// Ready
http.createServer(app).listen(process.env.PORT || 8080, function() {
  console.log('Listening on port ' + (process.env.PORT || 8080));
});
Finally, the Dockerfile inside Node directory:
# Set the base image to Ubuntu
FROM ubuntu
# Install Node.js and other dependencies
RUN apt-get update && \ apt-get -y install curl && \ curl -sL https://deb.nodesource.com/setup | sudo bash - && \ apt-get -y install python build-essential nodejs
# Install nodemon, note that app must NOT run as a daemon, or Docker will exit our container immediately
RUN npm install -g nodemon
# Provides cached layer for node_modules
ADD package.json /tmp/package.json
RUN cd /tmp && npm install
RUN mkdir -p /src && cp -a /tmp/node_modules /src/
# Define working directory
WORKDIR /src
# Add all files inside directory
ADD . /src
# Expose port
EXPOSE 8080
# Run app using nodemon
CMD ["nodemon", "/src/app.js"]
Create Nginx Image
The important part in this project, is the way Nginx is configured. We will use a predefined configuration to make our Nginx redirect traffic to different Node instance, which IP Address of each instance will be registered by Docker inside hosts file. Our nginx.conf will look like:
worker_processes 4;
events {
  worker_connections 1024;
}

http {
  upstream node-app {
    least_conn;
    server node1:8080 weight=10 max_fails=3 fail_timeout=30s;
    server node2:8080 weight=10 max_fails=3 fail_timeout=30s;
    server node3:8080 weight=10 max_fails=3 fail_timeout=30s;
  }

  server {
    listen 80;
    location / {
      proxy_pass http://node-app; proxy_http_version 1.1;
      proxy_set_header Upgrade $http_upgrade;
      proxy_set_header Connection 'upgrade';
      proxy_set_header Host $host;
      proxy_cache_bypass $http_upgrade;
    }
  }
}
Note that we here define 3 distrint Node servers named node1, node2, node3. Those are the names used in Docker Compose later.
We have Dockerfile to build Nginx instance like follow to have it use our custom configuration:
# Set nginx base image
FROM nginx
# Copy custom configuration file from the current directory
COPY nginx.conf /etc/nginx/nginx.conf
Local Build Using Docker Compose
We need to install Docker Compose first. This is straightforward and I will assume that you have it installed already. Note that if you are using Boot2Docker, you should execute your docker-compose command inside boot2docker bash. The docker-compose.yml for our application looks like this:
nginx:
  build: ./Nginx
  links: - node1:node1 - node2:node2 - node3:node3
  ports: - "80:80"
node1:
  build: ./Node
  links: - redis
  ports: - "8080"
node2:
  build: ./Node
  links: - redis
  ports: - "8080"
node3:
  build: ./Node
  links: - redis
  ports: - "8080"
redis:
  image: redis
  ports: - "6379"
Here we define 5 containers, which refer to our 3 images. Docker Compose will call build command, setup linkage and run everything since we execute:
$ docker-compose up
Our server will be up and run in a few minutes. Point to your localhost, or to your Boot2Docker IP Address to see your application running:
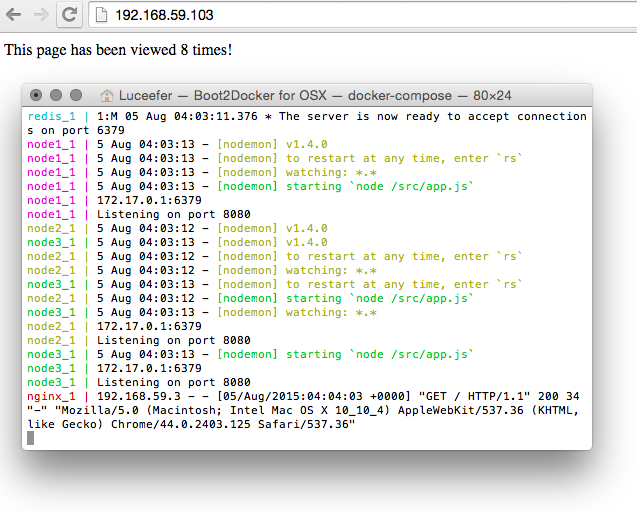
Publish To Repository
Note that at previous post, we have built our images by using Docker Compose. It automatically creates image names for us, which we may don’t want to. We will manually build our images like this:
$ cd Nginx
$ docker build -t diepnh3/demo-nginx .
$ cd ../Node
$ docker build -t diepnh3/demo-node .
$ cd ../Redis
$ docker build -t diepnh3/demo-redis .
```
Note that the names I have assigned, have syntax of `<docker-user-name>/<image-name>`. We use this syntax to easily publish our image. To do this, we login to Docker Hub:
```
$ docker login
```
Enter credentials as needed, then:
```
$ docker push diepnh3/demo-nginx
$ docker push diepnh3/demo-node
$ docker push diepnh3/demo-redis
```
It should take minutes based on your Internet connection. After it is completed, go to your repository to see is it successfully published:
[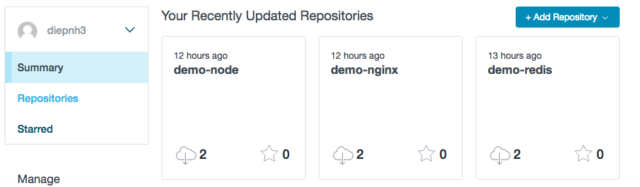](/content/images/2015/08/DockerSuccessPublish.png)
## Create AWS EC2 Instance
Go to your own cloud provider control portal and launch an instance of Ubuntu. Maybe you will prefer your own Azure Virtual Machine or DigitalOcean VPS. It’s up to you. Then install Docker and Docker Compose using instruction from Docker home page using a SSH connection to our instance.
Next, in SSH connection with current working directory, we create a `docker-compose.yml`, note that we do not use our local .yml file because the local file points to local build image, while we want to use our public published image instead:
```
$ nano docker-compose.yml
```
Fill it with similar content like our local file, but image link is replaced with published version:
```
nginx:
image: diepnh3/demo-nginx
links: - node1:node1 - node2:node2 - node3:node3
ports: - "80:80"
node1:
image: diepnh3/demo-node
links: - redis
ports: - "8080"
node2:
image: diepnh3/demo-node
links: - redis
ports: - "8080"
node3:
image: diepnh3/demo-node
links: - redis
ports: - "8080"
redis:
image: diepnh3/demo-redis
ports: - "6379"
```
Close the editor (Ctrl-X), then do the build:
```
$ docker-compose up
```
Wait for it is up, then go to your public IP of your cloud instance. You should see our application is working correctly right away, without involving any code and dependencies inside our instance. That’s powerful feature of Docker.
And that’s it. Hope you have a good overview about flow when we are working with real application inside Docker environment and how can we perform deployment with Docker. Thank you!